Checklist to determine your vintage Rolex condition.
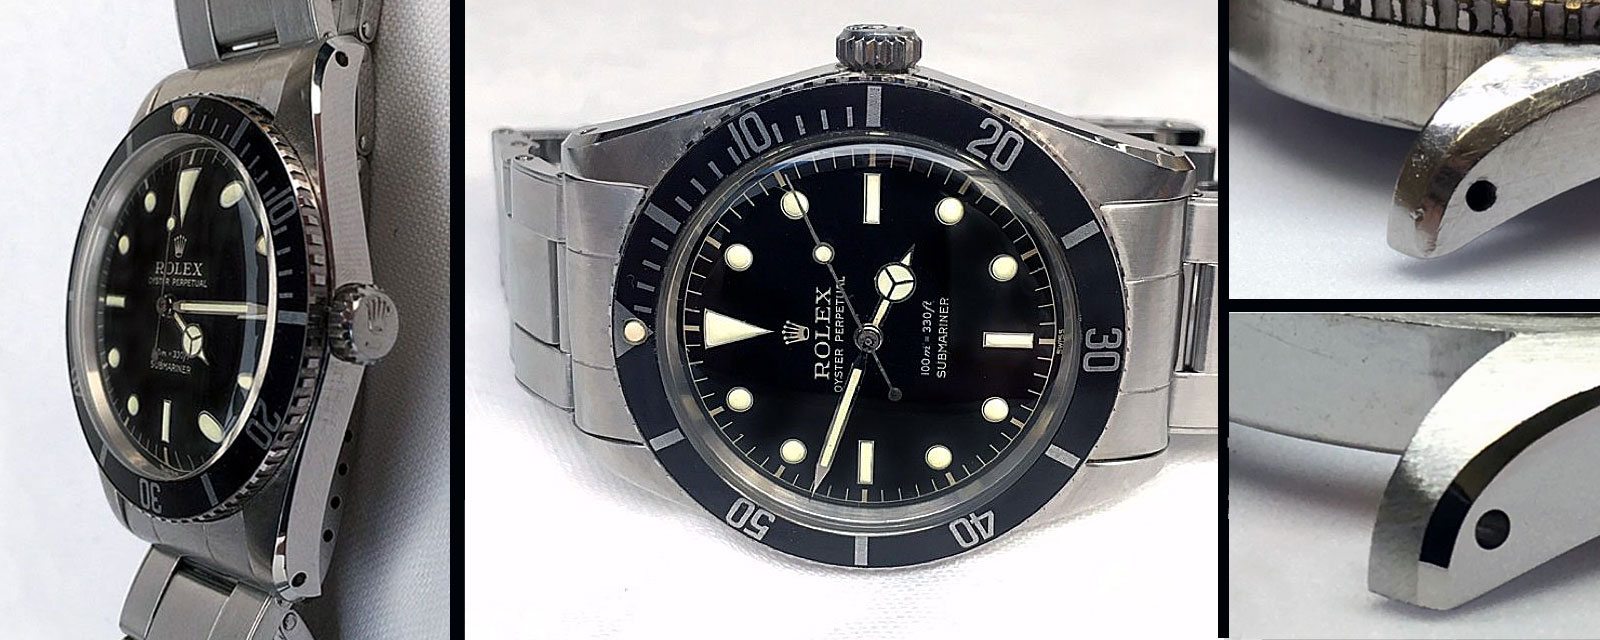
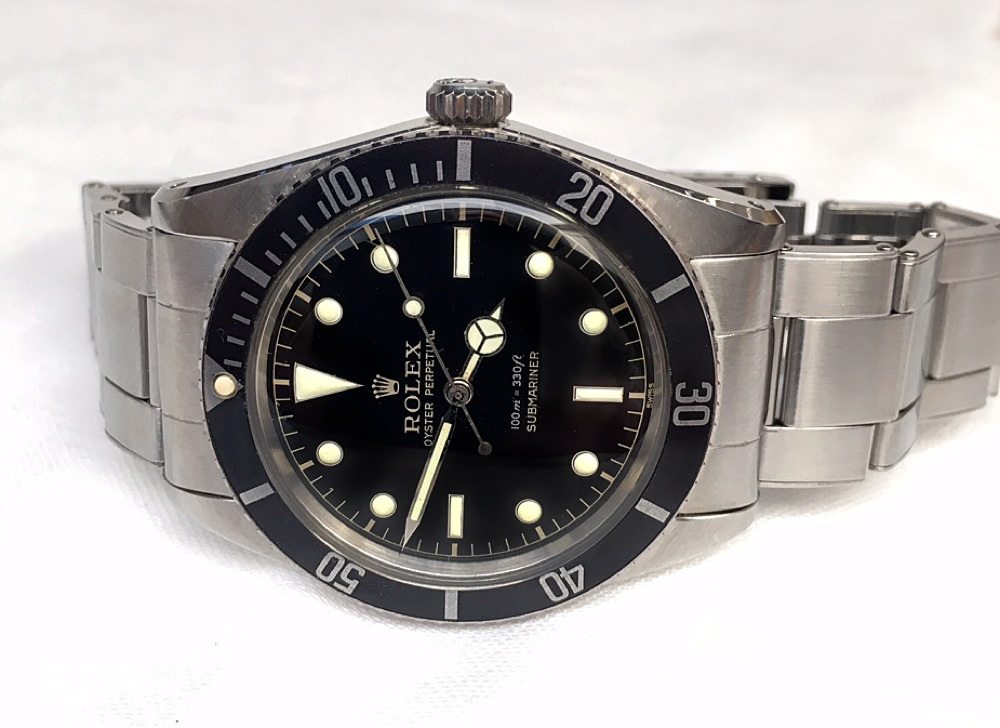
Before even considering zooming in on details, your first look should always be at the so- called matching all over patina. If a certain part of the watch, e.g. the case, shows clear traces of wear and tear, this should match with the condition of the watch in other places such as the dial, inlay, etc.
- Magnify the matt parts of the case
- Magnify lugs, font and back
- Magnify bevelled edges between matt part and middle case
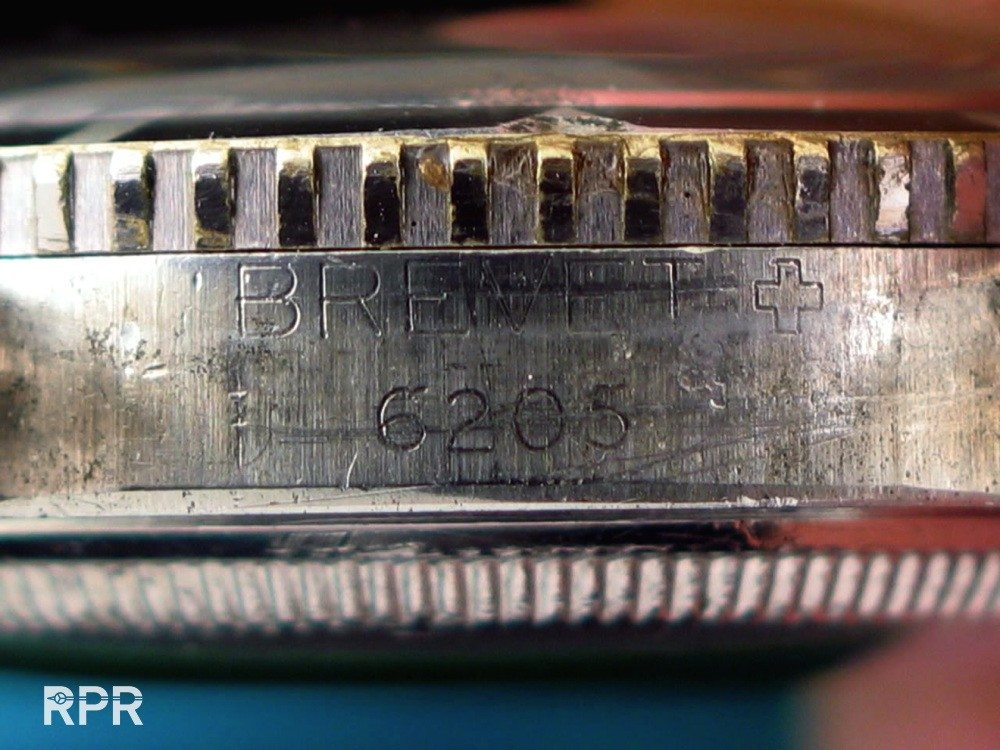
- Case back engravings worn out
- Hallmarks on back of lugs worn out but fresh case
- Satin polish: difference case back inner circle and outer rim
- Missing straight fine lines
- Missing sharpness on edges of lug holes
Unpolished
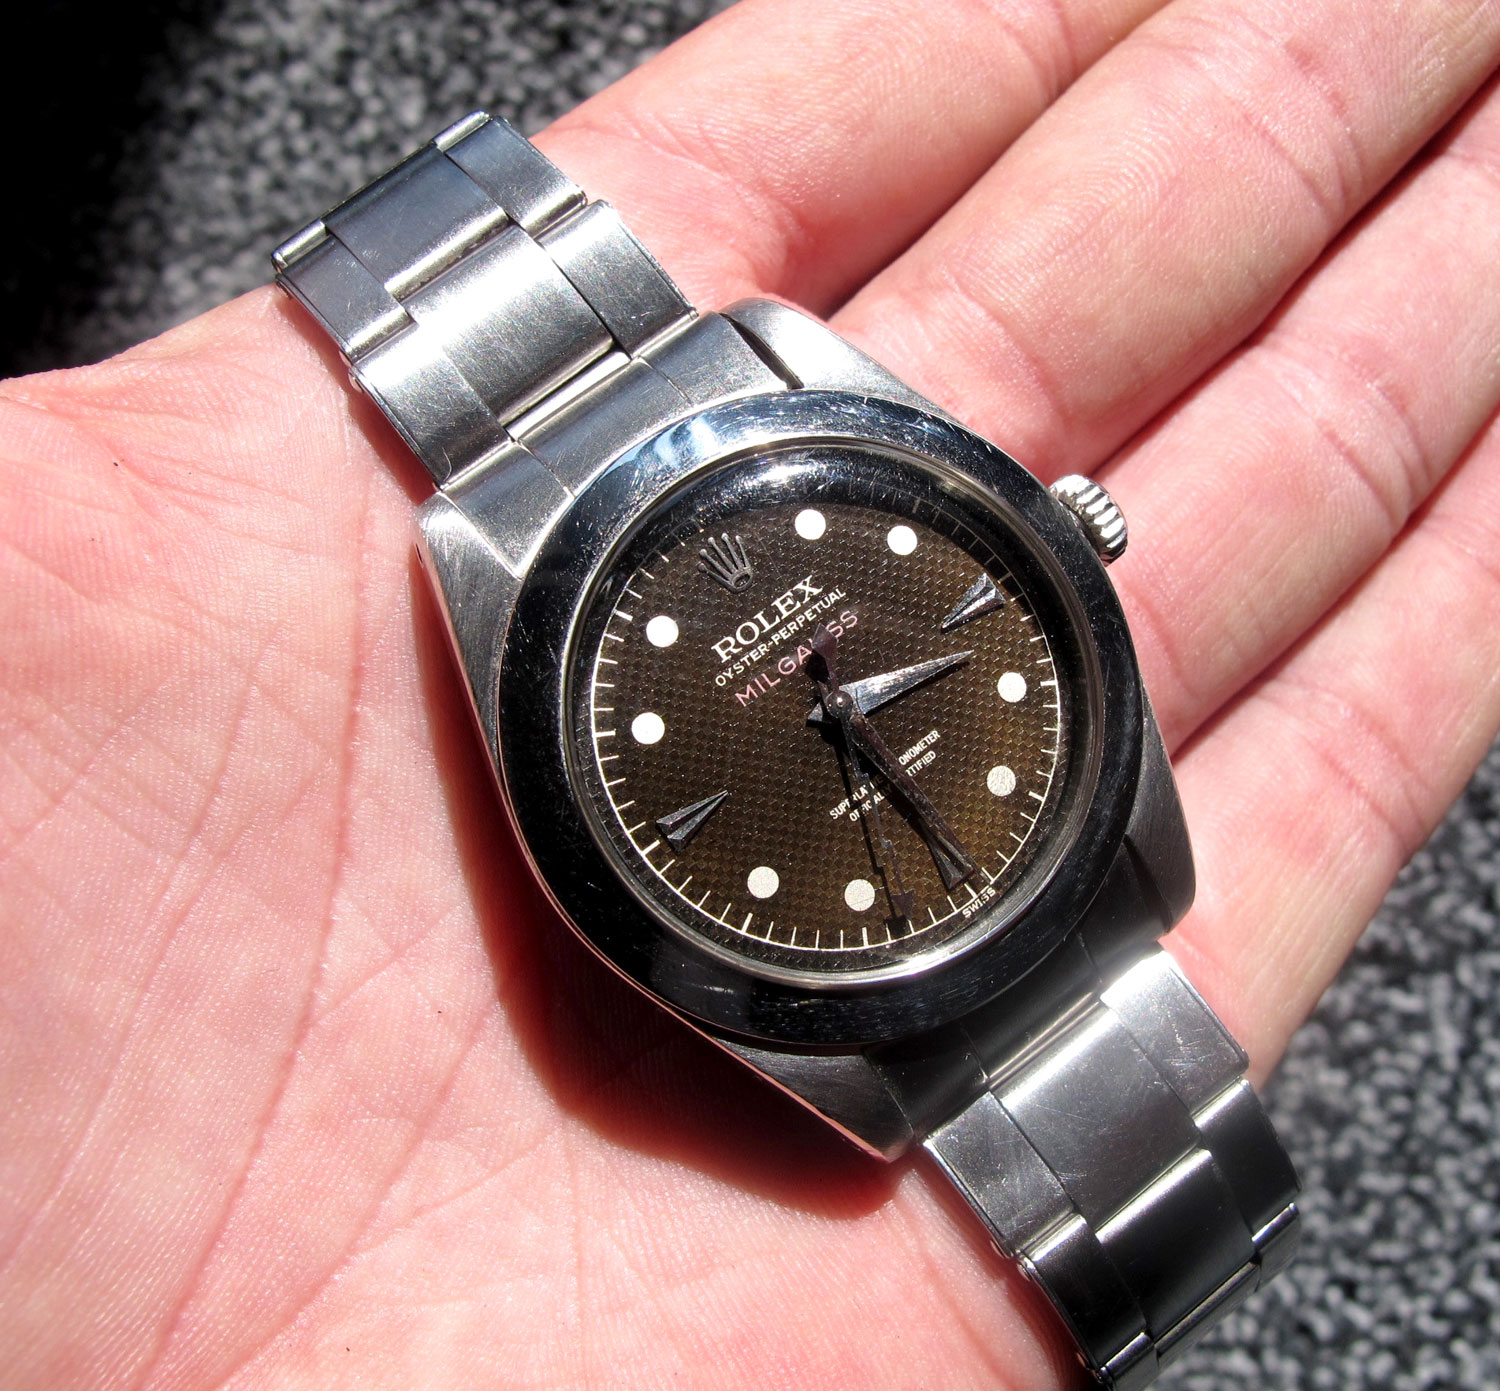
In case you are not sure how a certain reference should look like unpolished, take a close look at the matte part of the watch with a suitable magnifier. The matte parts will tell you if a watch has been polished or not. Below I will post some pictures from unused vintage Rolex so you can compare yours with. Here’s a unpolished like new small crown Ref 5508. Focus on the edges…
Every angle is still sharp, the side from the bezel, no marks on the crown or side of the case and also not on chamfer of the bevel.
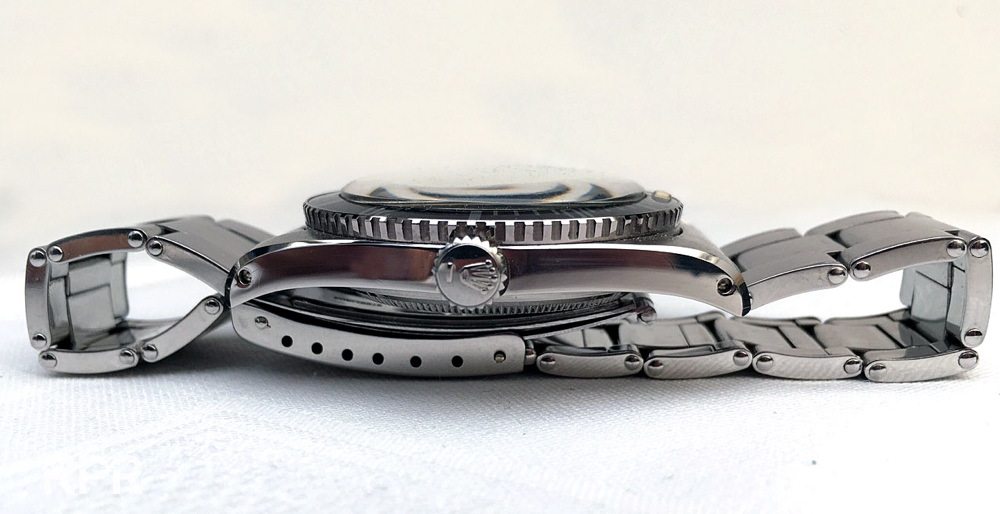 In case you are not sure how a certain reference should look like unpolished, take a close look at the matte part of the watch with a suitable magnifier. The matte parts will tell you if a watch has been polished or not…
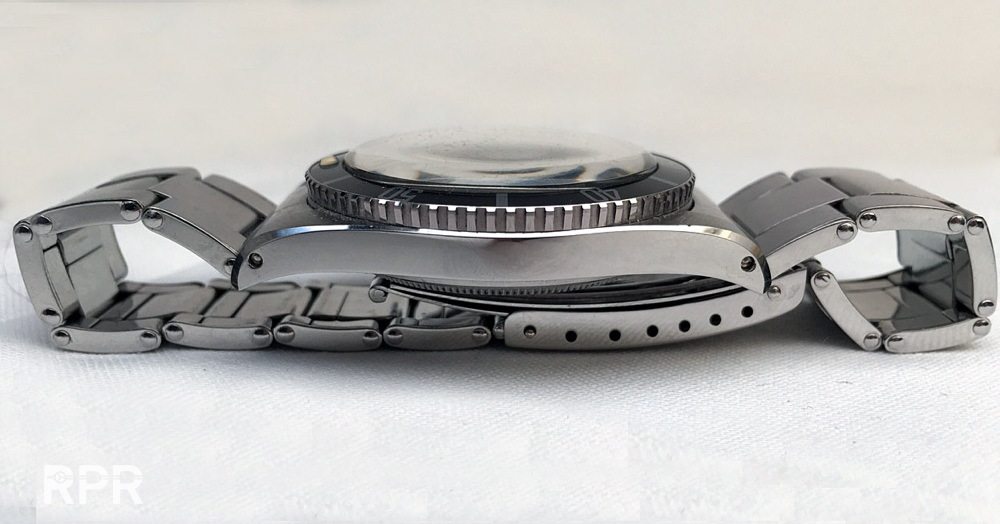
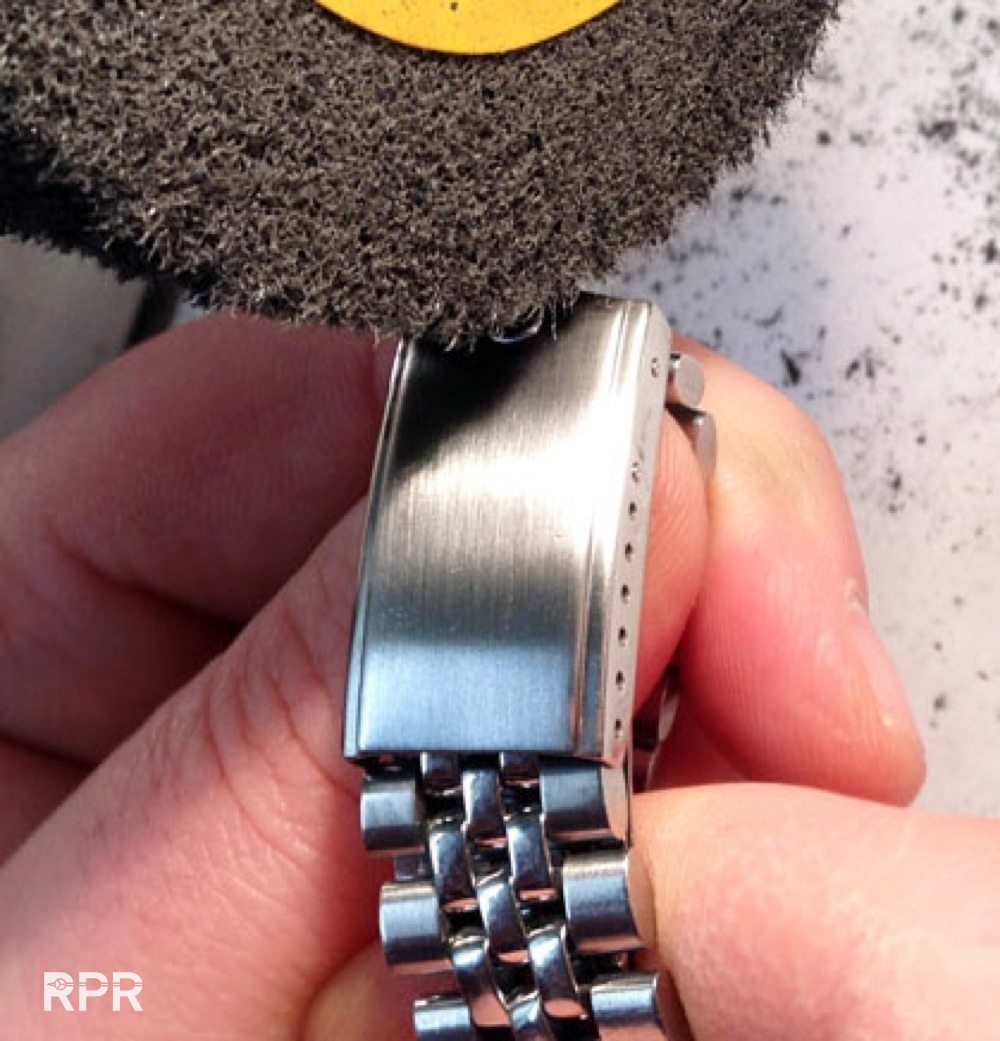
A unused bracelet is still stiff, you need to bend the links. When removing the band with the push pins before polishing, it will always leave trace marks on the case. That is why the lugs are often sealed with tape before band removal. A clear sign of a service polish are the drilled lug holes, or better yet the sharpness of the lug hole edges. Because once polished, these lug holes will lose the original sharp edges.
Following is a GMT Ref 6542 also unpolished and unused. Hard to believe that these almost 60 year old Rolex have been tucked away and now see the daylight. In a scale of impossible to find these unused miracles are listing top position. Collectors grail.
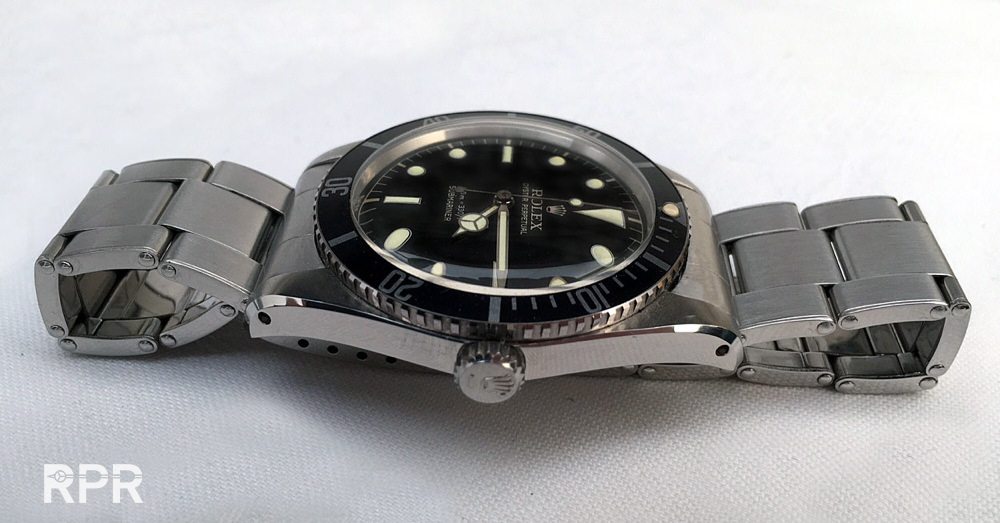
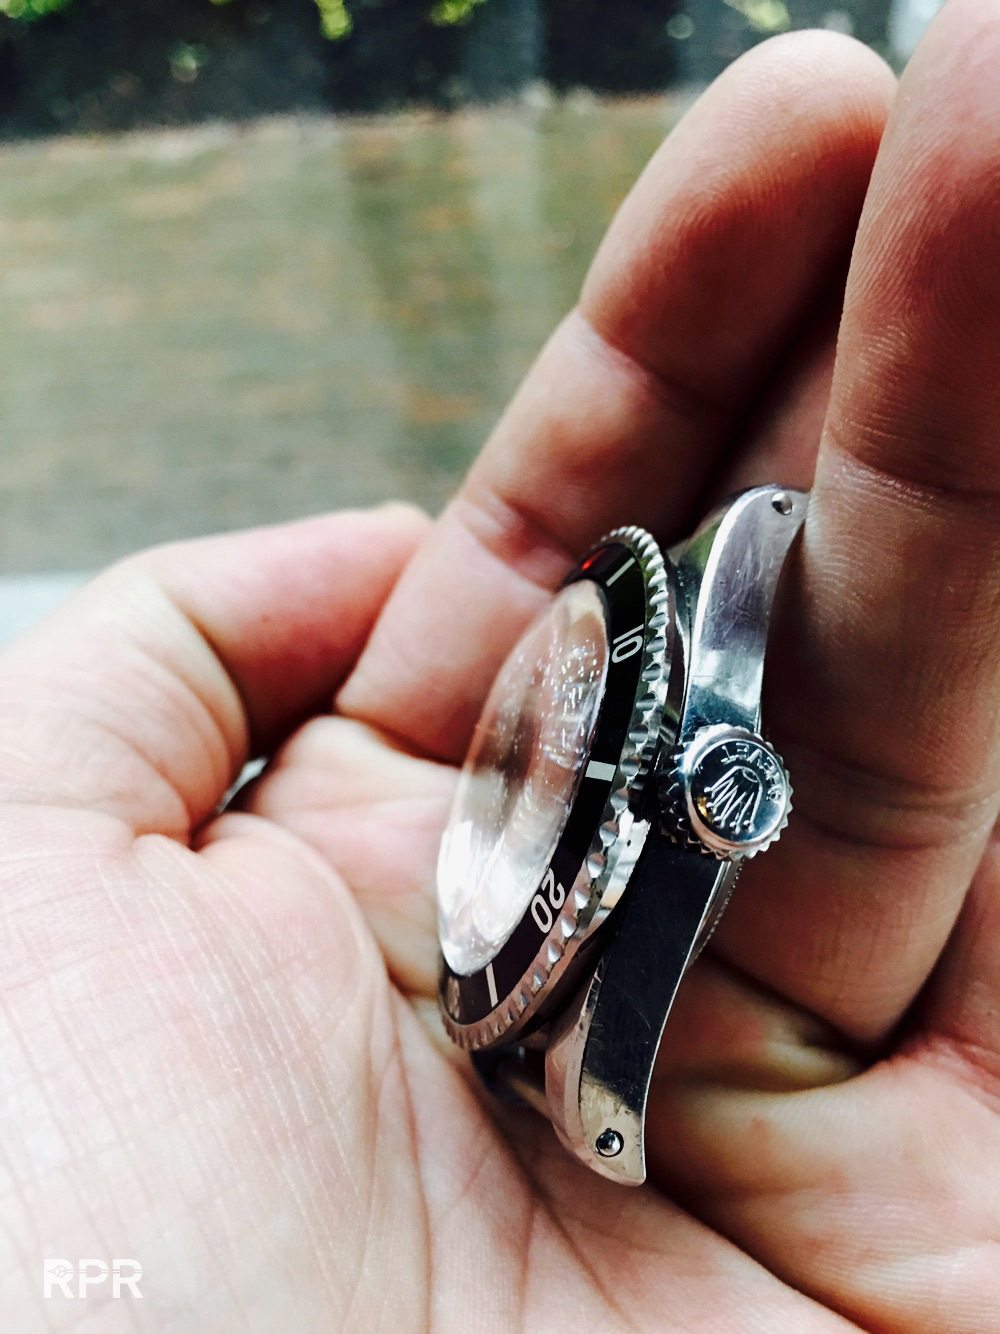
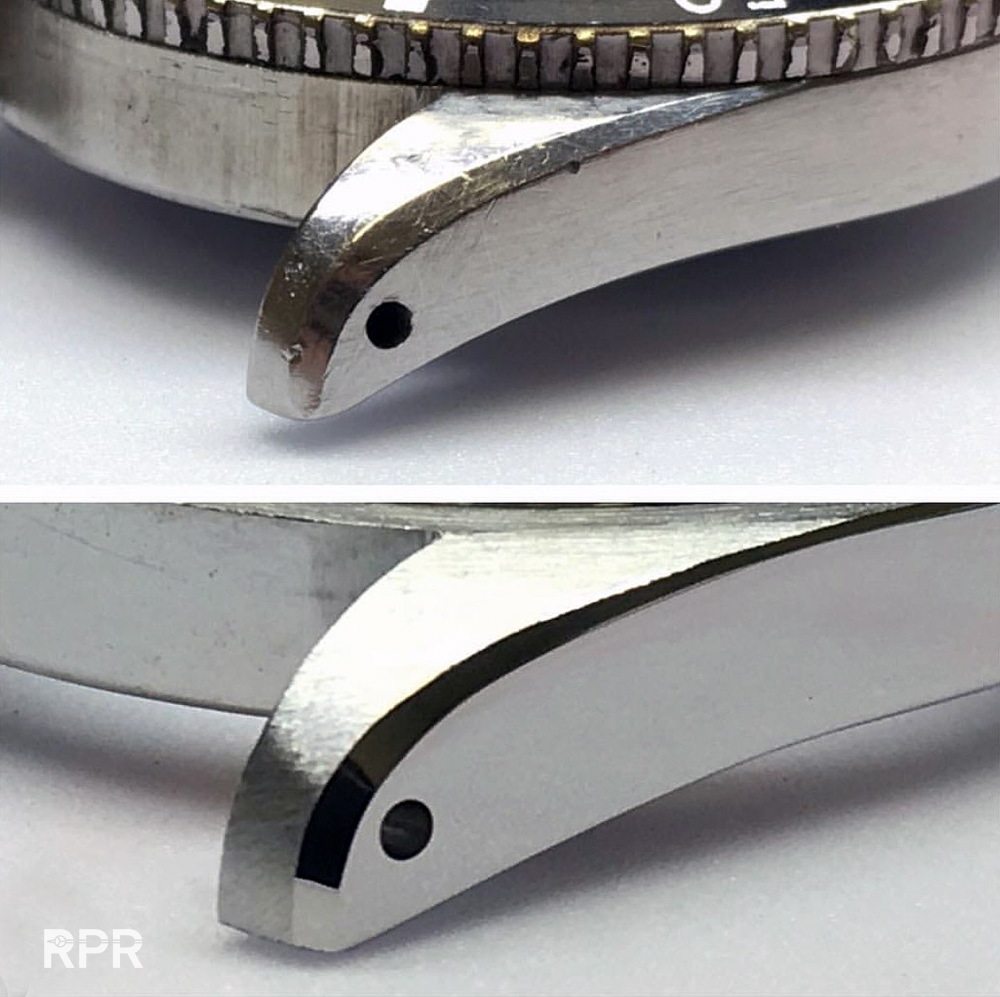
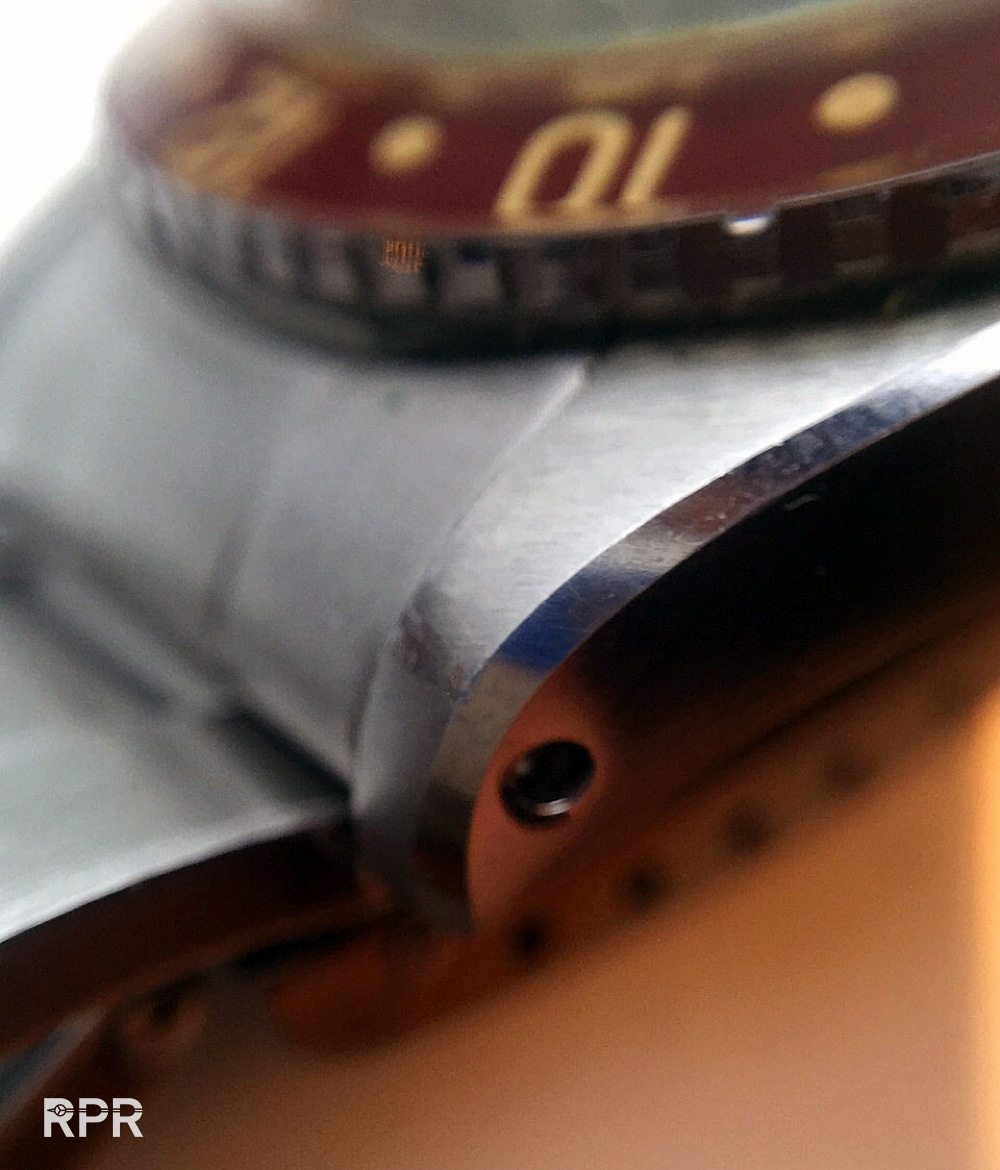 Another part to check if a watch has been polished are the chamfers, the bevelled edges between the matte part and the middle case. Tool watches like the Daytona or dresswatches like the DateJust and Daydate did not have chamfers. You will only find them on the Submariner , Milgaus, GMT-Master and Explorer II. Perhaps because of this rarity and value, bevels are particularly loved by vintage collectors. A bevel was merely for esthetical purposes. Each model had its own bevel, the bevel on the GMT-Master was a bit smaller than the Submariner one. This has to do with the fact that the Submariner model was thicker than the GMT-Master and the Submariner winding crown larger.
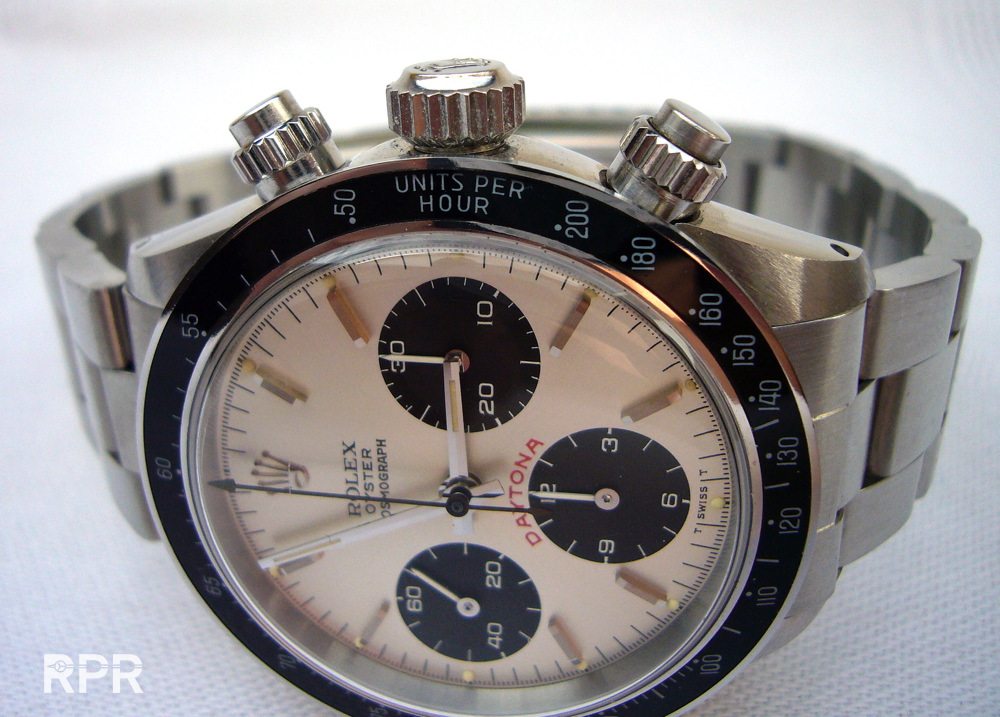
 Little less rare are those unused, NOS (New Old Stock) Rolex from the 70-80-ids. Here’s a NOS Ref 6263 Daytona. Note the sharp bezel and all edges. There are professional polishers who take the whole watch apart when trying to polish it back to Rolex standard. This will inevitably cause loss of material, unless the polishing has been done very lightly. Not easy, as it requires highly developed polishing skills because you only get one shot. If it goes wrong, the transition in polish is clearly visible. But if you get it right, it is harder to detect with the naked eye.
 Another indicator if a watch has been polished or not, is by looking at the fine lines on a watch. If these are not straight, the polishing has been done by hand. Unpolished watches only have a manufacture polish, meaning the case has a satin polish that was done at the Rolex factory before all parts were assembled.
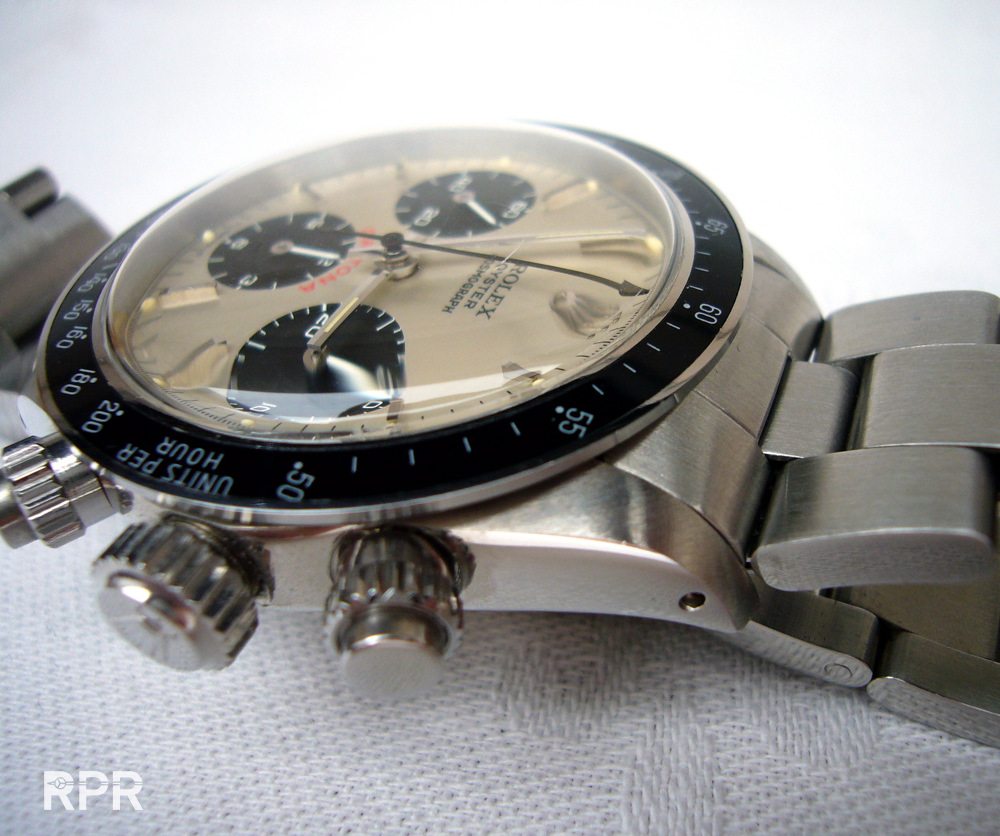 Every place where wear and tear could happen is still unused, the crowns, the case back, the lugs, the sides, bracelet, crystal. If you compare the case with the band, you will often see a difference in finish because the band is easier to polish than the case. The lugs are especially difficult to handle, so this is an area that requires extra attention with your magnifier. While attempting to make the case matte again, there will always be a 1mm spot against the edge, impossible for a polishing machine to reach. In fact, you could only do a proper polishing job by taking the whole watch apart.
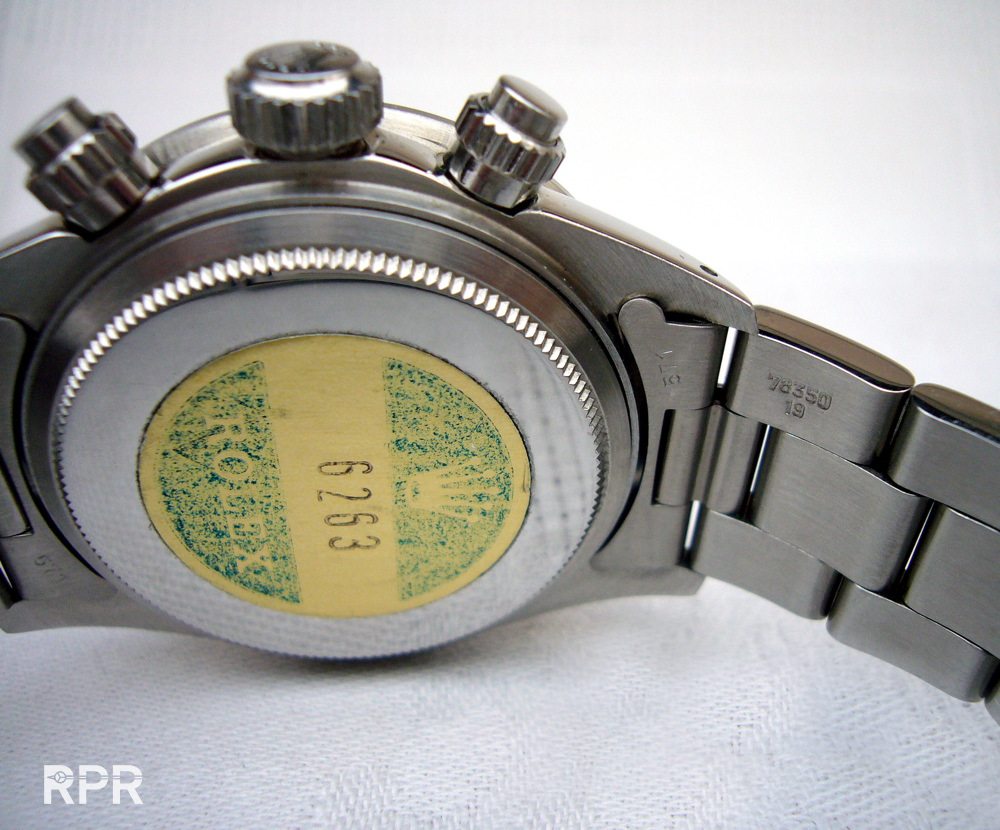 Wear indicators case side
- Original crown or replacement
- Replacement crown periodically correct
- Magnify pushers if present
- Magnify top left lug for heaviest wear (left wrist watch wearers)
- Magnify below lugs for end link scratches
- Magnify below lugs for dirt/dust
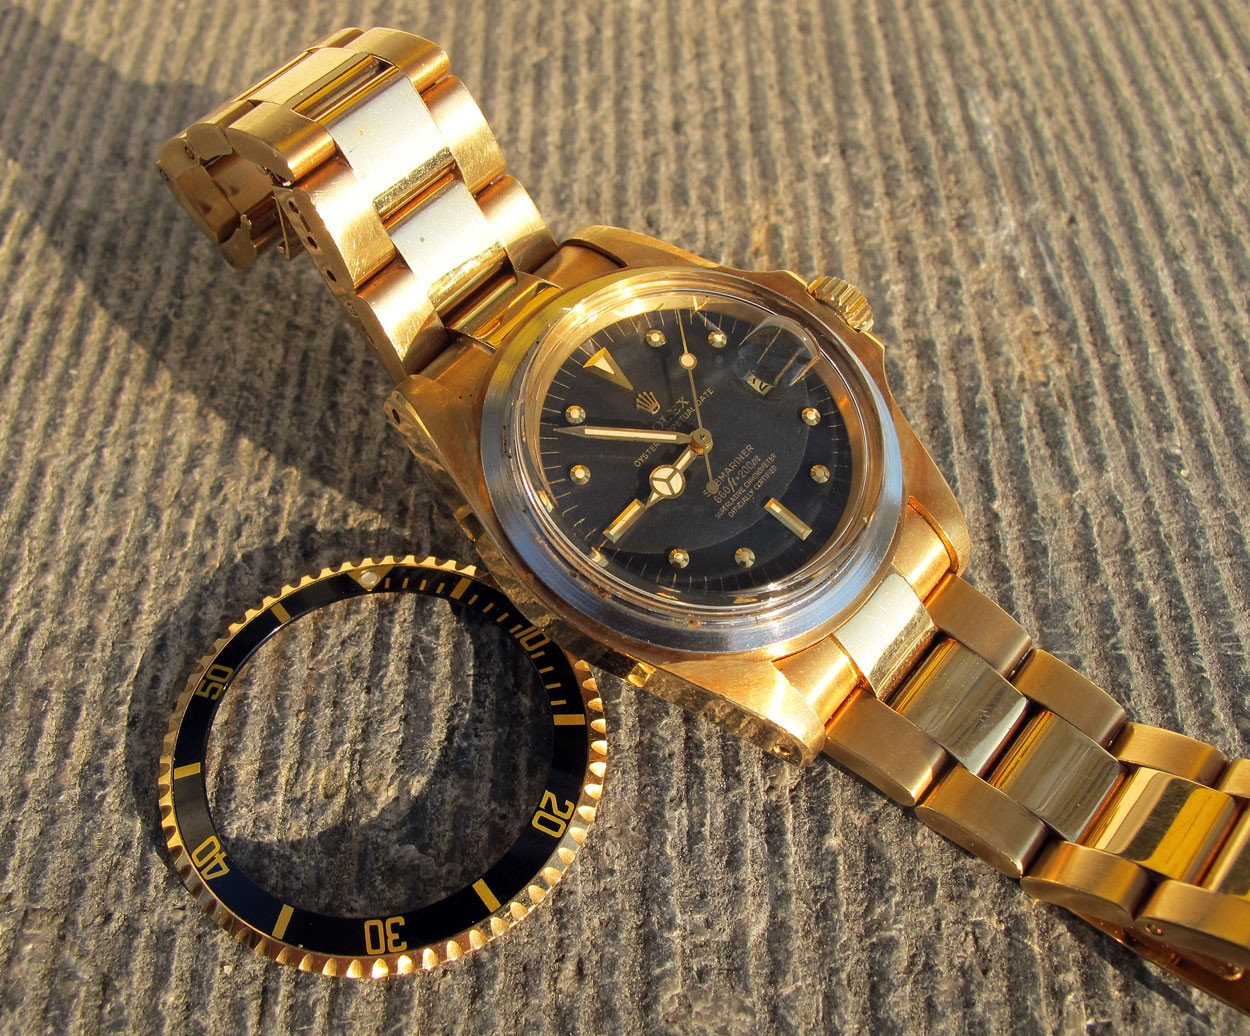 A used but unpolished gold Rolex Submariner Ref 1680 nipple dial. With gold cases it’s very easy to see if they are polished or not. One complicating factor in assessing the polishing of a case, is that the satin factory polish has become more coarse over the years, if you compare models of the 1950s/1960s/1970s. I believe this has to do with the fact that production numbers rose rapidly and less time was spent on the finish of a watch due to the introduction of machine polish and laser check.
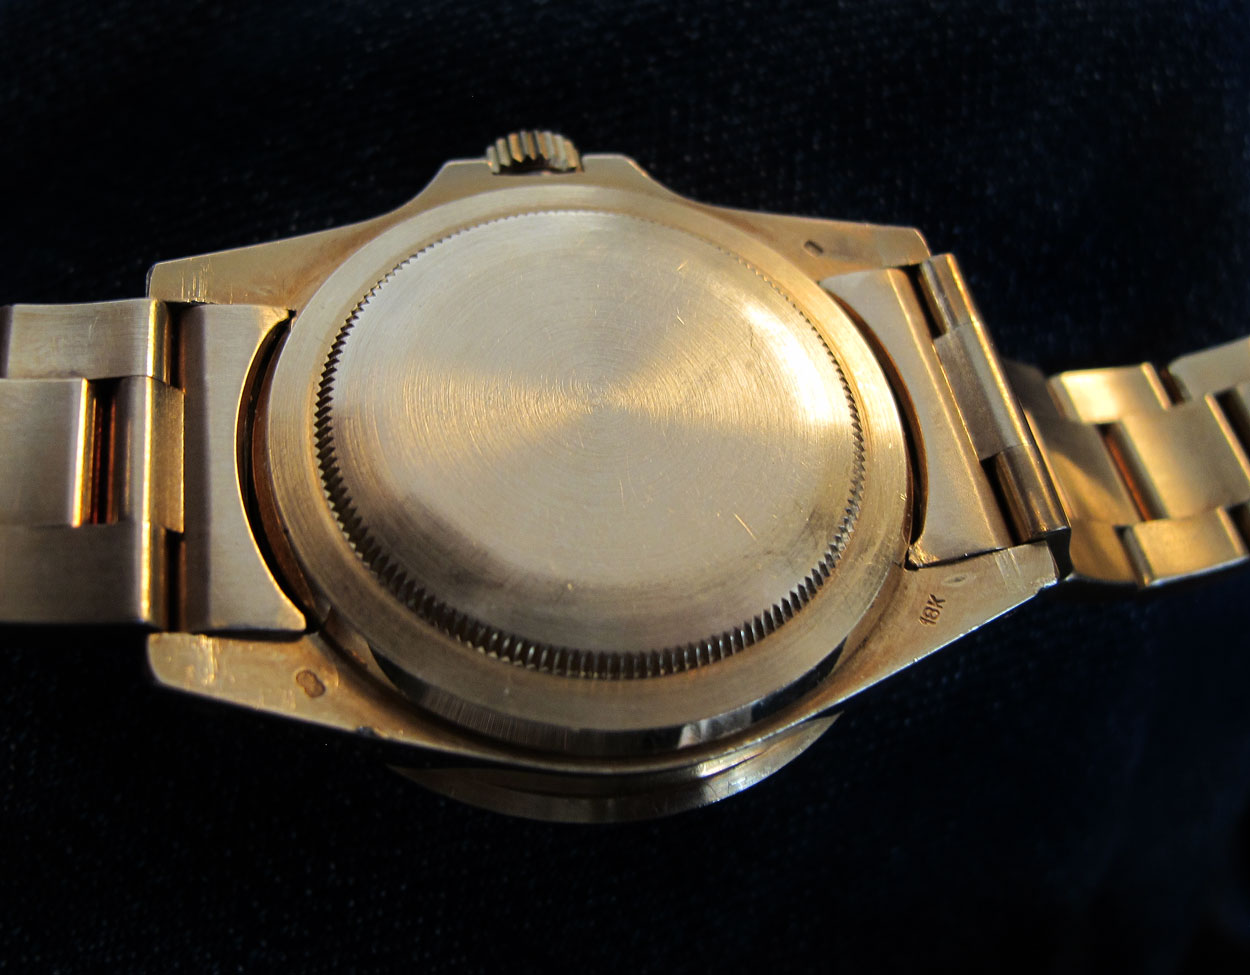 When polished, the back of the lugs will often have the same round finish as the case. You would expect this finish on the inner circle of the case back as well, but this will be sealed with tape during polishing. Still, you can always feel the difference between the factory satin polish and service polish if you go from the inner circle to the outer polished rim.
Wear indicators case back
- Magnify screw thread for frequent opening of case
- Original rubber sealing ring present
- Original rubber sealing ring or replacement
- Tarnish on screw thread
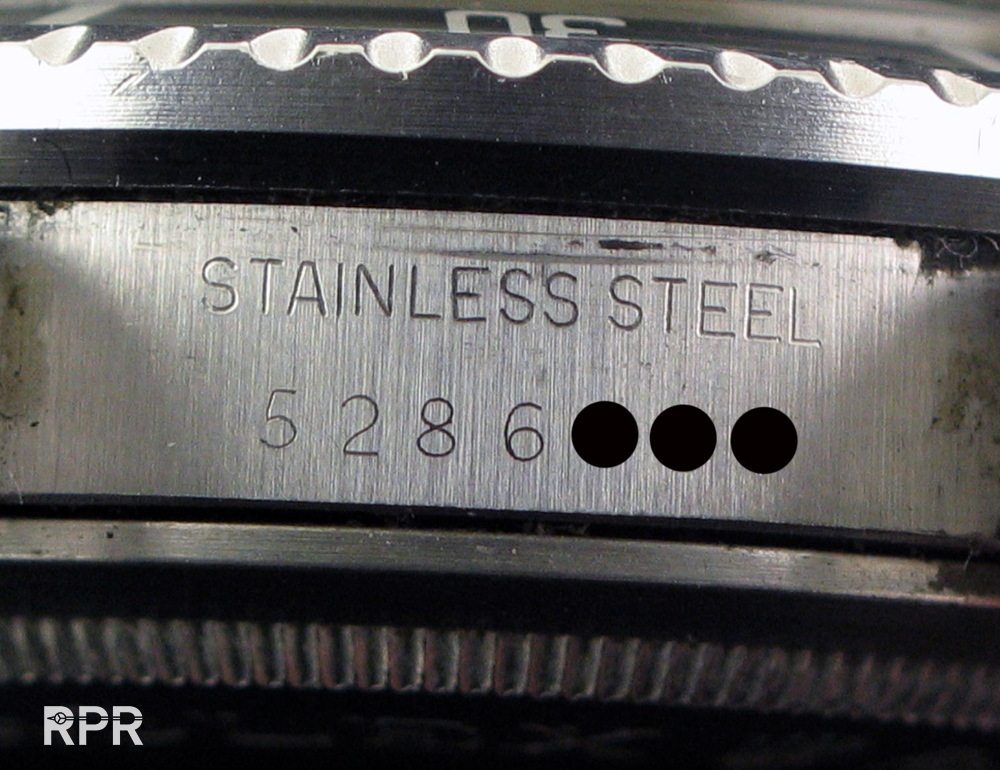
- Magnify case back for service codes
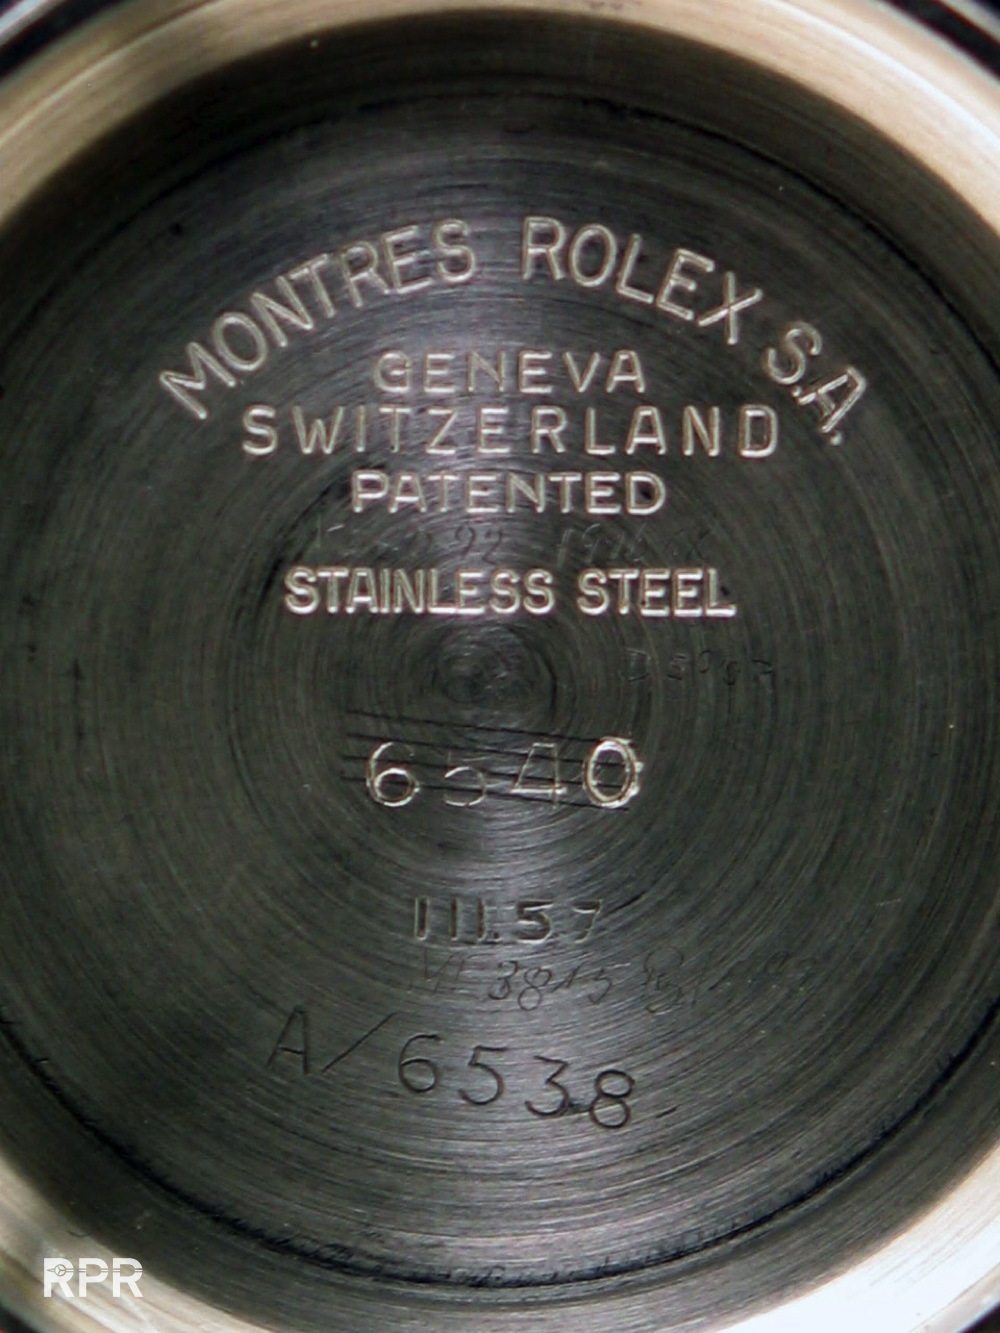 In below ref 6200 Big Crown case back you don’t find any little service marks engraved as you see above, instead you see that the automatic rotor left a circled mark in the case back.
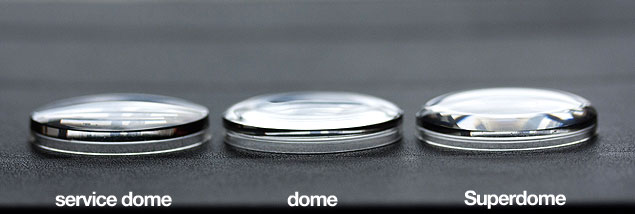
- Original crystal?
- If original, is there any ‘icing” visible
- Is it a later service crystal with sharp edge
- Correct crystal type corresponds with model
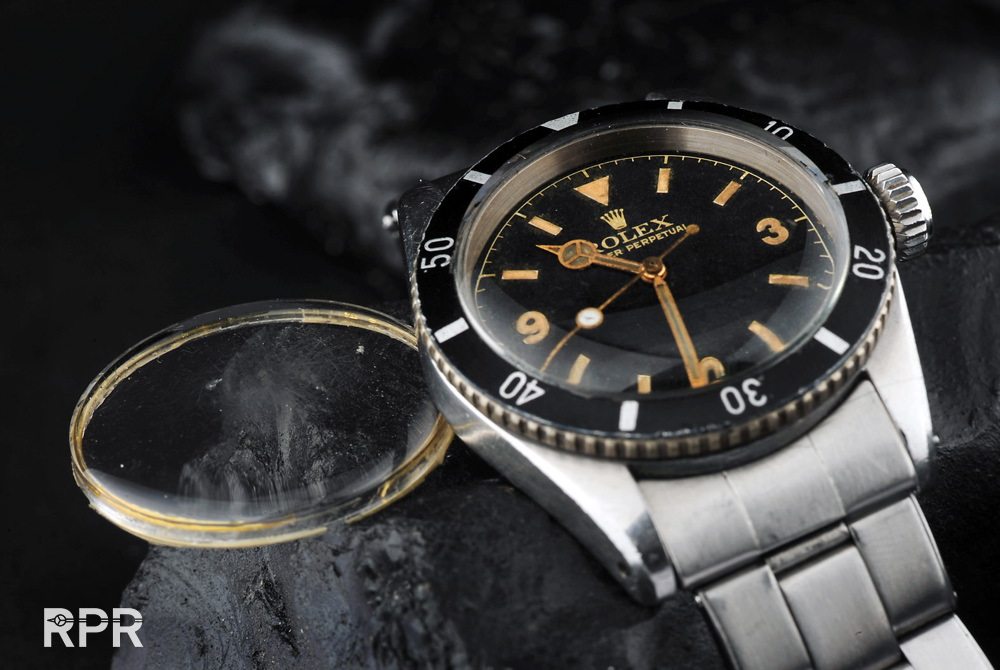 Above original Crystal on the left with lots of radium dust in there, be careful!
In below A/6538 Military Bg Crown you see the ‘icing’ in the crystal..
- Patina movement corresponds with patina watch
- Magnify screw near crown for damage, those are often used to get the movement out of the case
- Magnify the screws that hold the movement in it’s place, in below example at the edge in the middle of the lugs.
- Magnify small screws for tarnish and if they have been used. Often a used one will show you burr on the screw.
- Examine the screw thread. Often the rubber seal shows you wear. Also salt water will leave marks clearly visible.
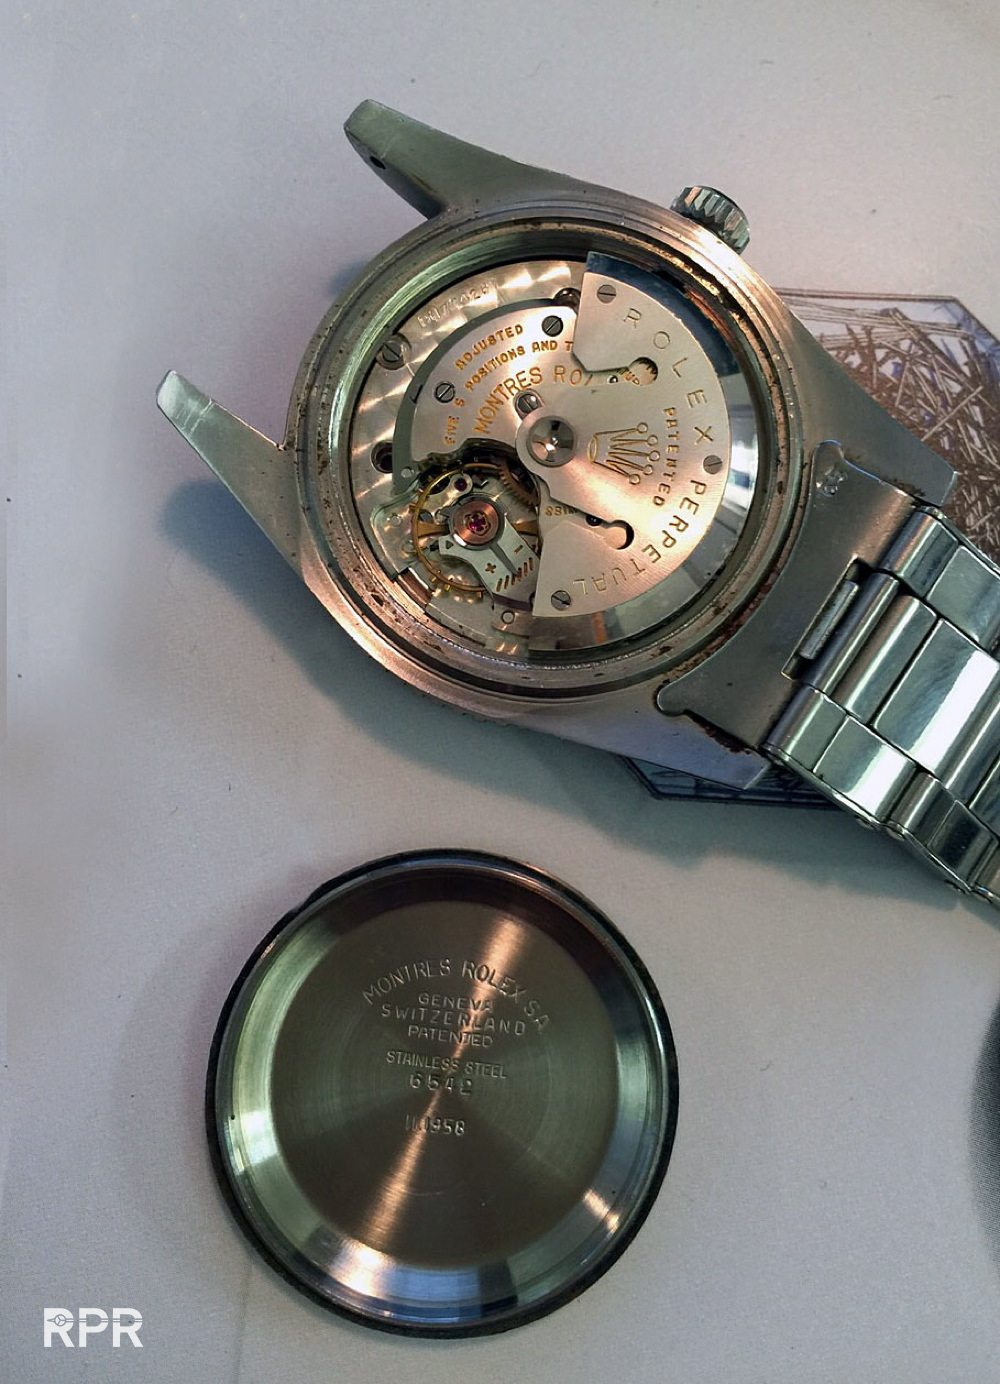 Above the unused Ref 6542 case back inside and movement, which still looks like new. Below a patinated and used movement..
- Serial Number present
- Magnify Serial Number for clear engraving
- Worn out Serial Number corresponds with worn out case
- Serial Number matching with model
- Serial Number matching with production date inside case back
- Reference Number present
- Magnify Reference Number for clear engraving
- Worn out Reference Number corresponds with worn out case
- Reference Number inside case back matching with number in between lugs
- Reference Number matching with model
Luminous
- Type of luminous matching with period of model:
- Swiss print with Radium luminous
- Swiss + ! with lower Radium luminous
- Swiss + _ with Tritium luminous
- Magnify for Golden Swiss, white Swiss, double Swiss corresponds with period of model
- Swiss – T<25 / T-Swiss-T / T-Swiss-T<25 corresponds with period of model
- UV-lamp lest luminous glow for several minutes
- Overall matching luminous in colour and fluffiness on dial, hands and markers
- Colour of luminous matches period of model (<1964 cappuccino vs yellow)
- Colour of luminous greenish indication for water damage
- Stains on dial due to damage Radium luminous
- Luminous paint completely inside surrounds
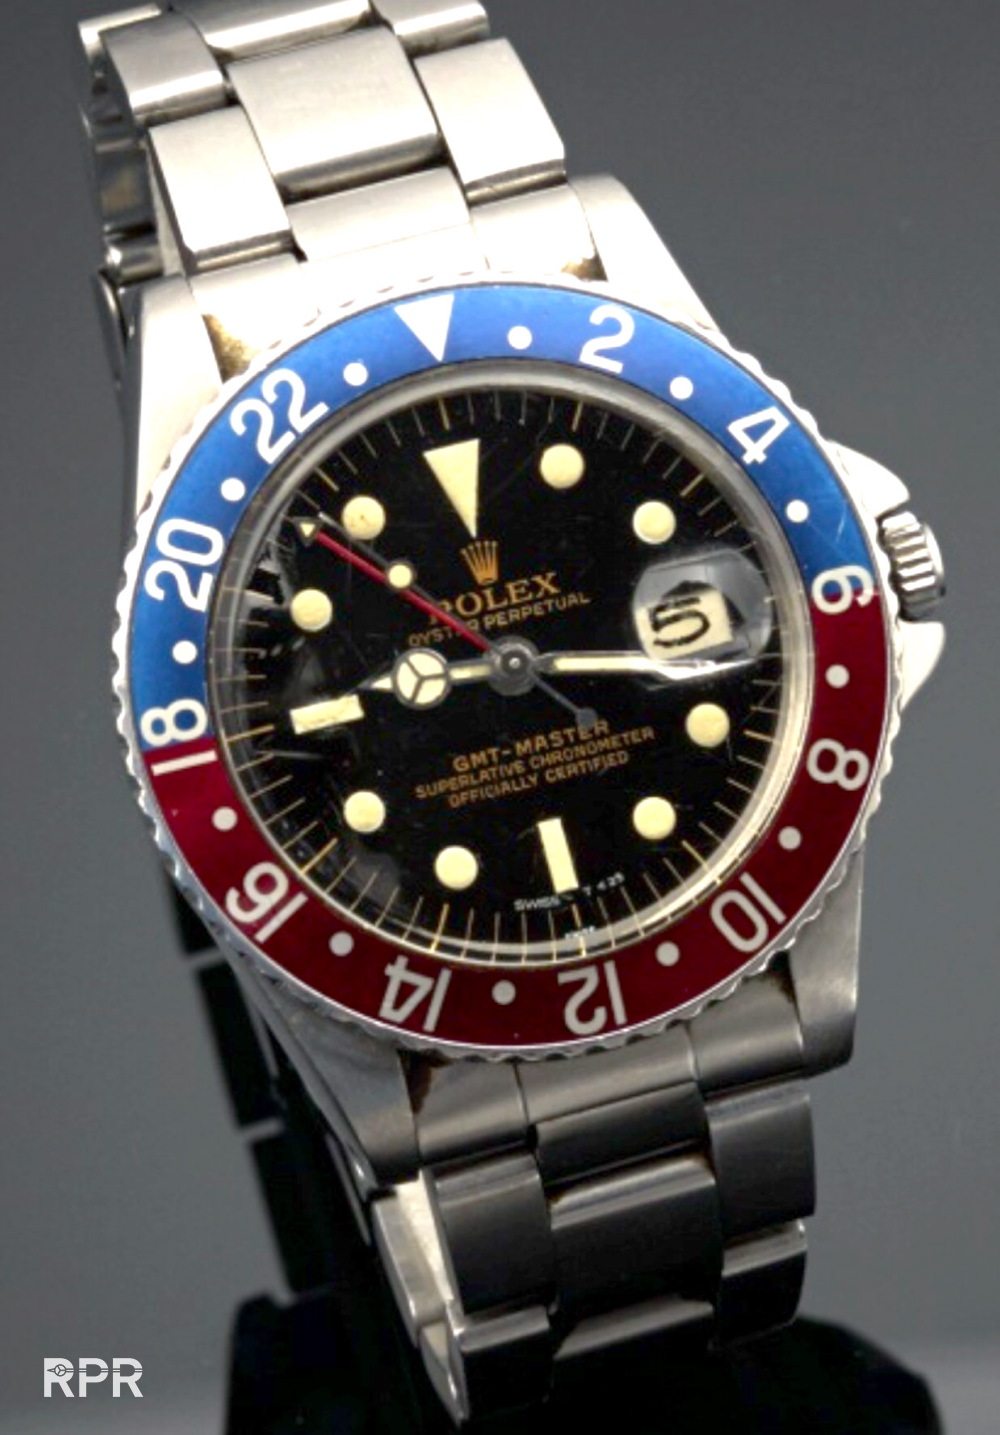
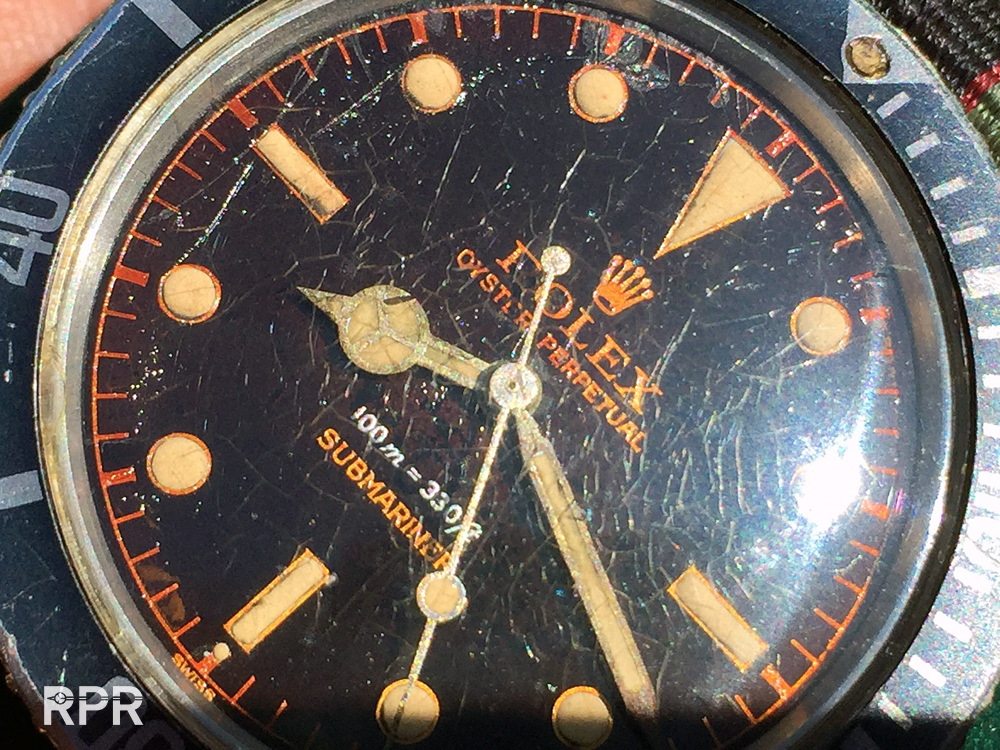
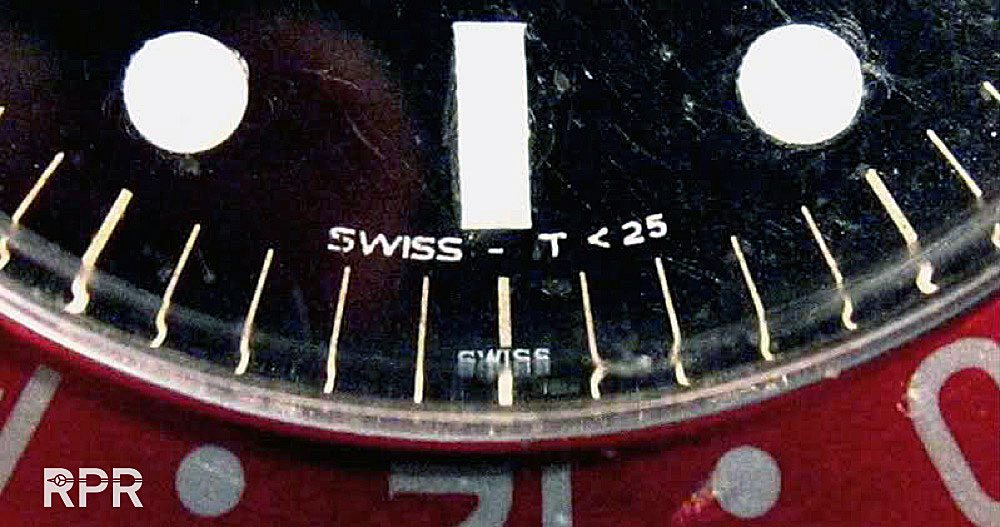 Above clearly visible are the 2 generation luminous stamps, the one below, swiss only and the one above, stating now that the luminous is of new generation, < 0.25MSv. Below interesting close up that shows the swiss has been reprinted over the lume.
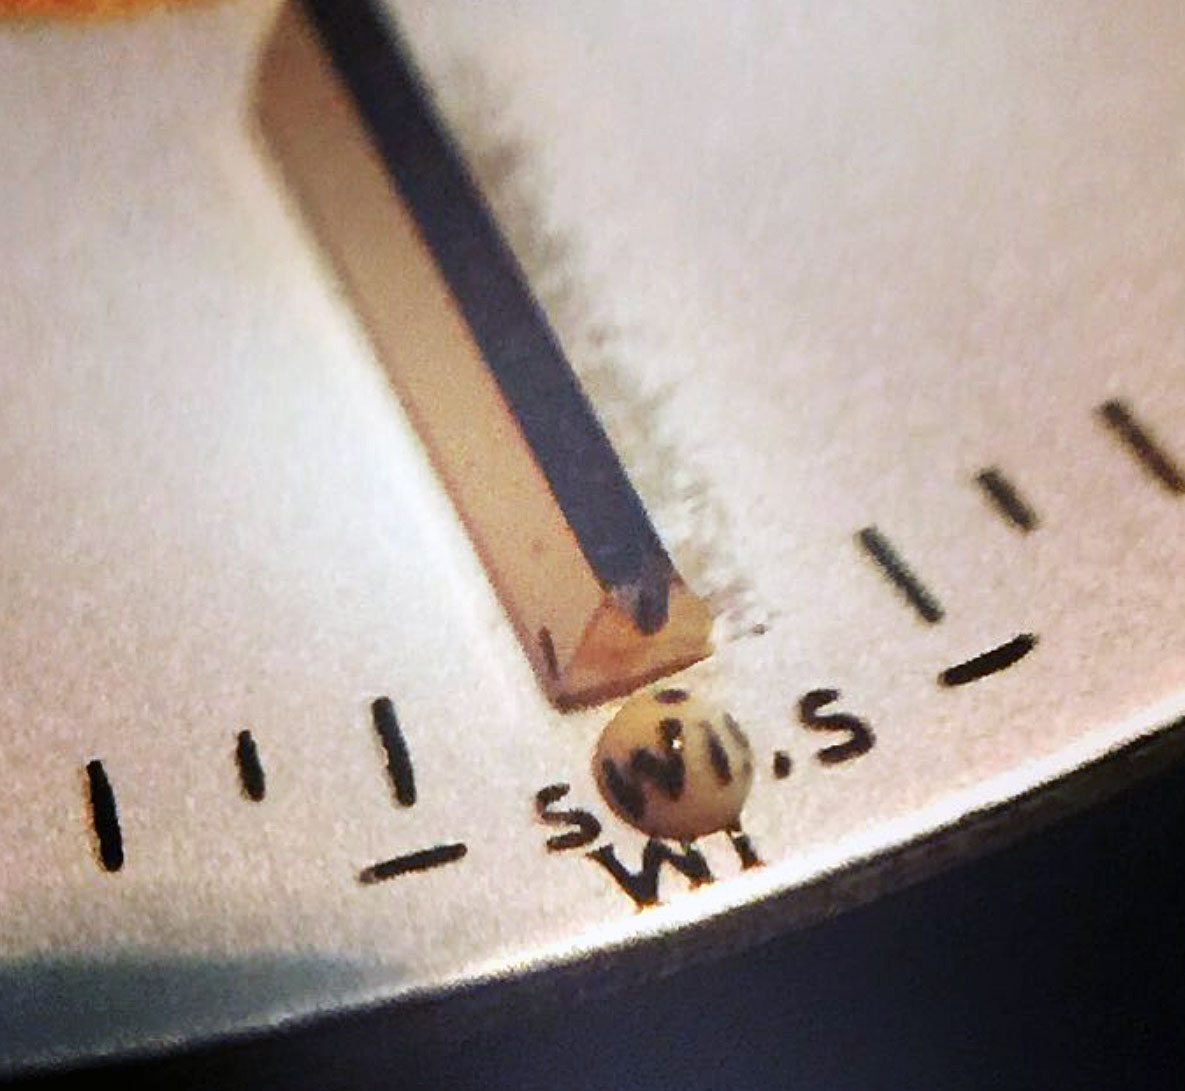 Then a close up of the compound of the luminous. It always make me feel like a cappuccino..
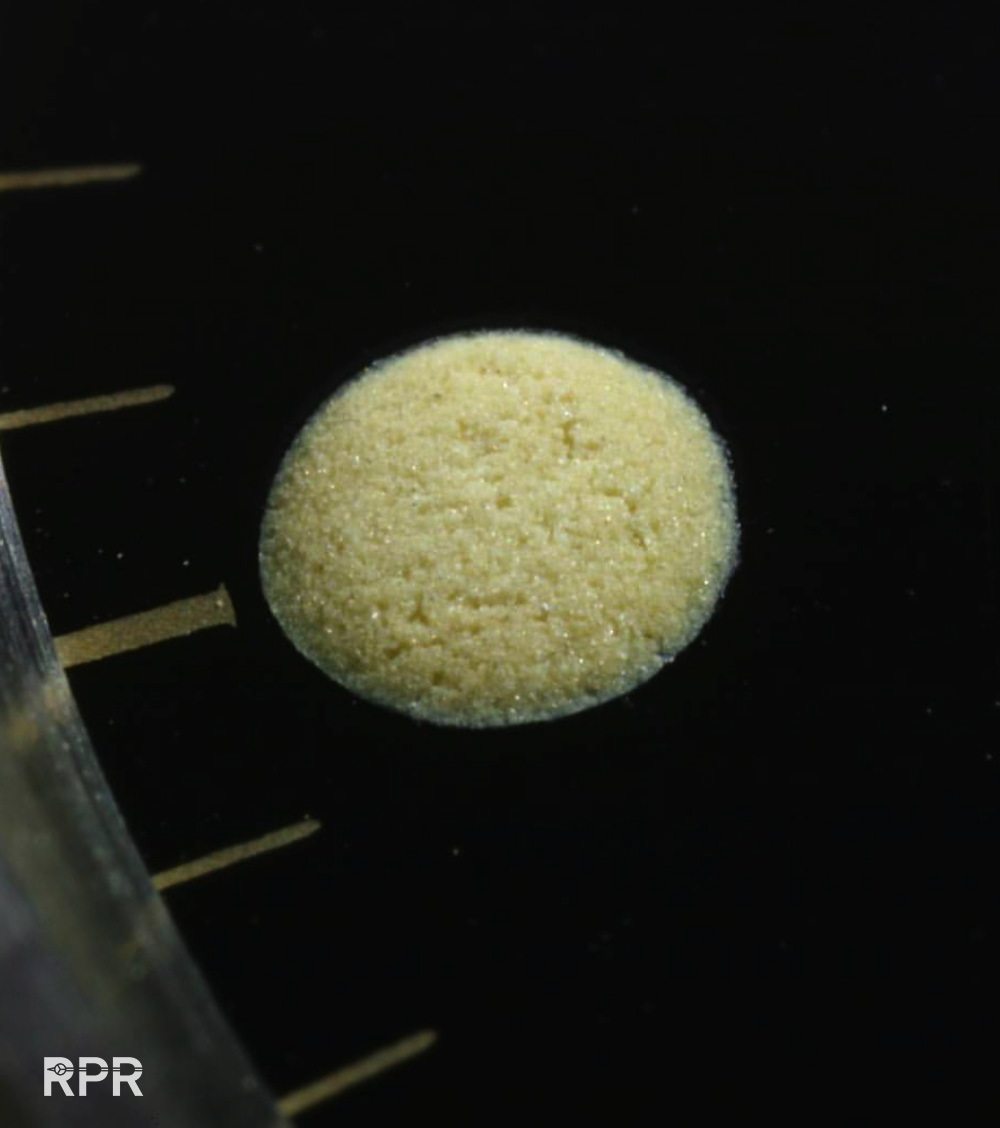 Composition
- Cracked dial when tilted in light
- Magnify gilt lettering for correct application
- Glossy dial corresponds with period of model
- Matte dial corresponds with period of model
- Tropical dial corresponds with period of model
- Tropical dial with intact luminous
- Rolex print under/over lacquer layer
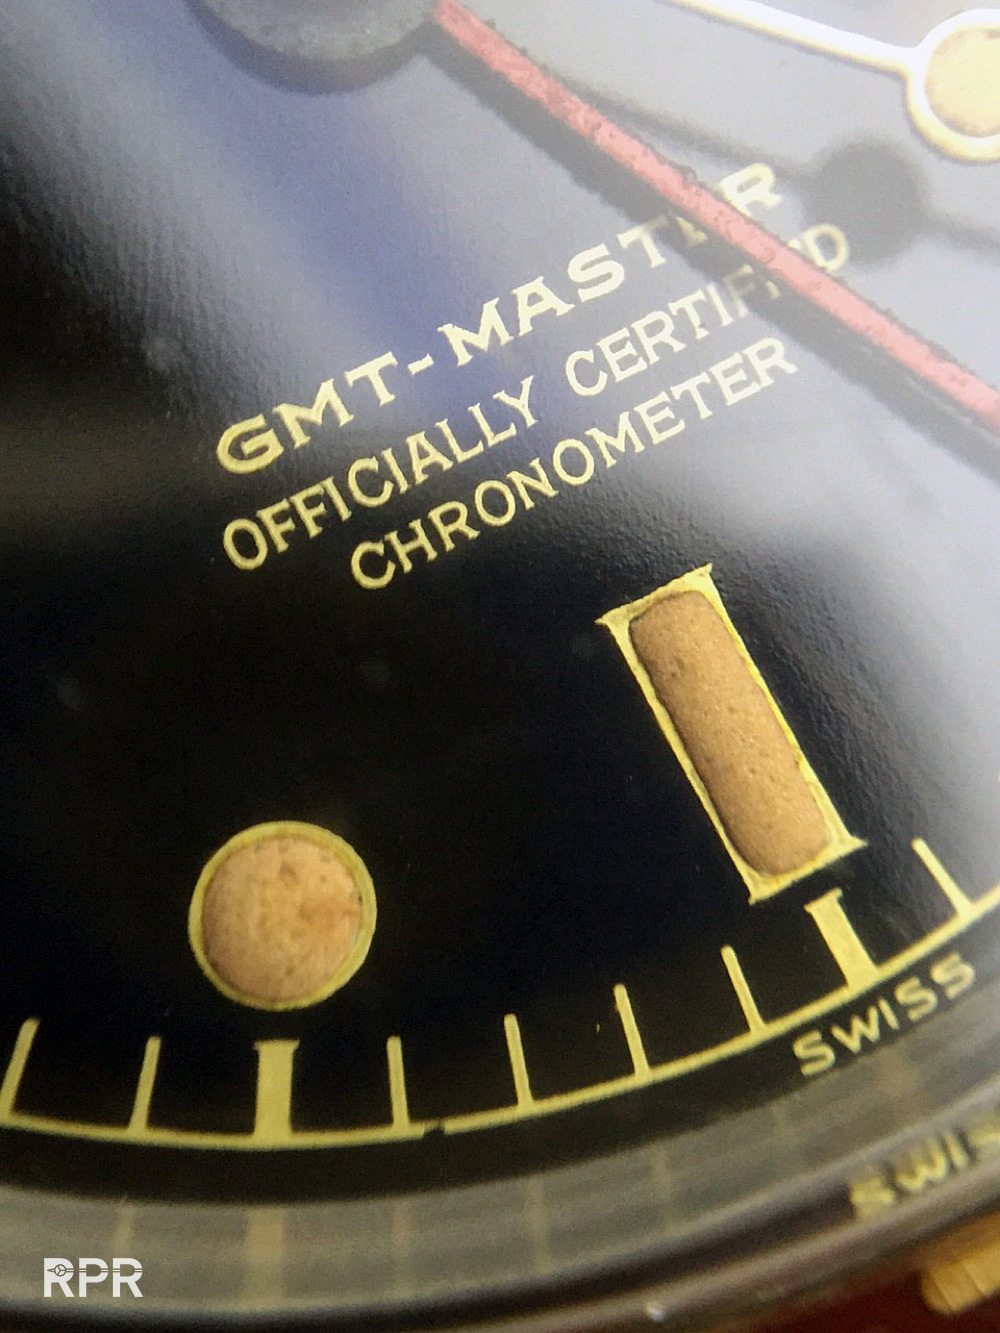 Above flawless glossy gilt radium dial and below a sunburned cracked spider dial…
- Ribbed edge of fluted bezel matches period of model
- Is the inlay original and matching the all over patina.
- Faded inlay matches dial and luminous, often inlays get changed.
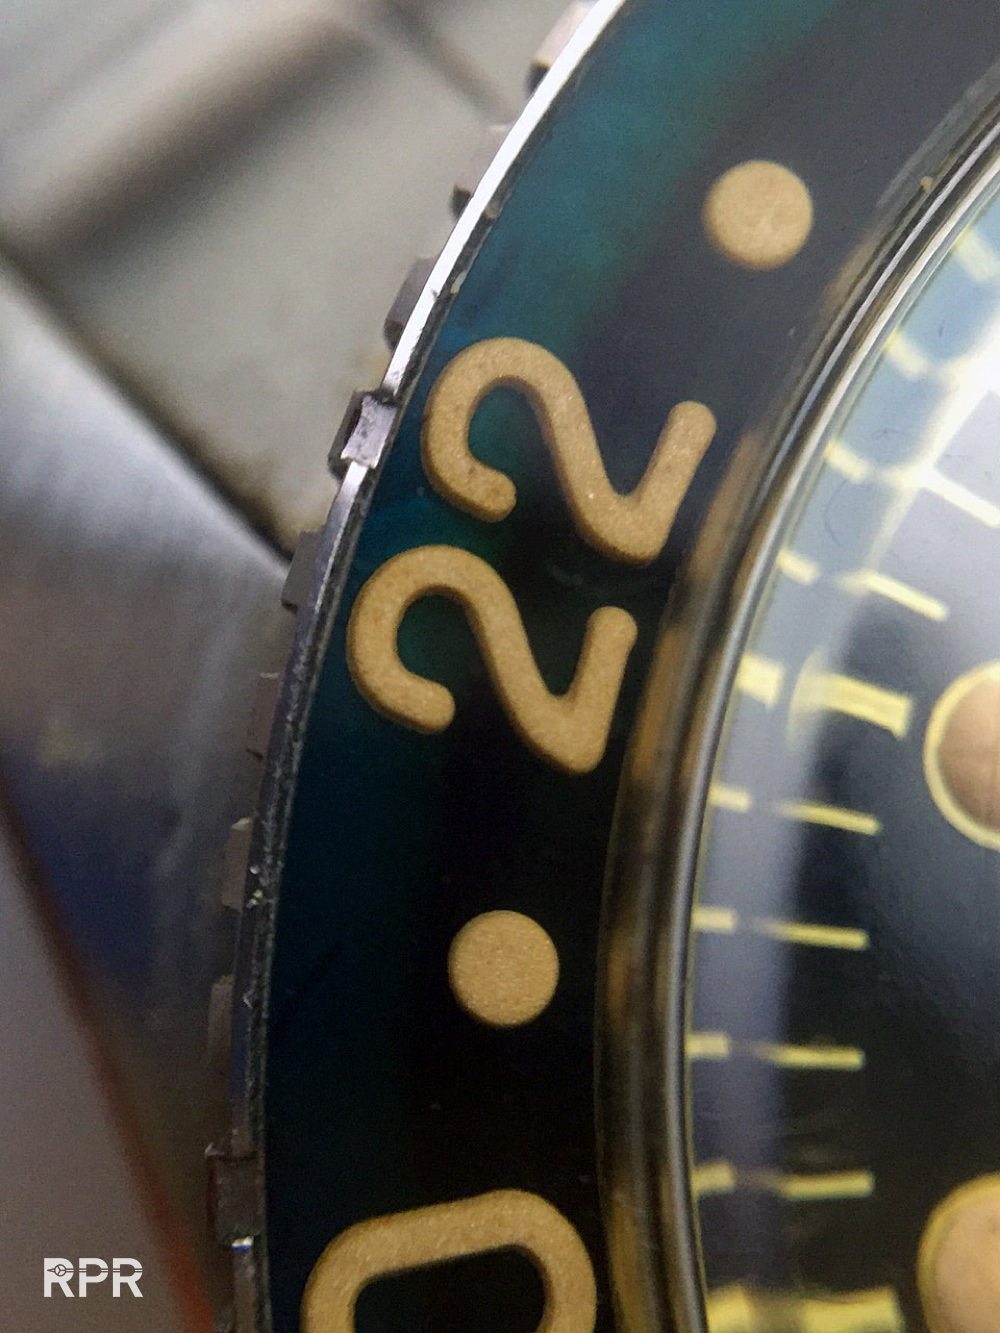 Bezel, insert, red triangle, bevel, crown guards, big, small crown…
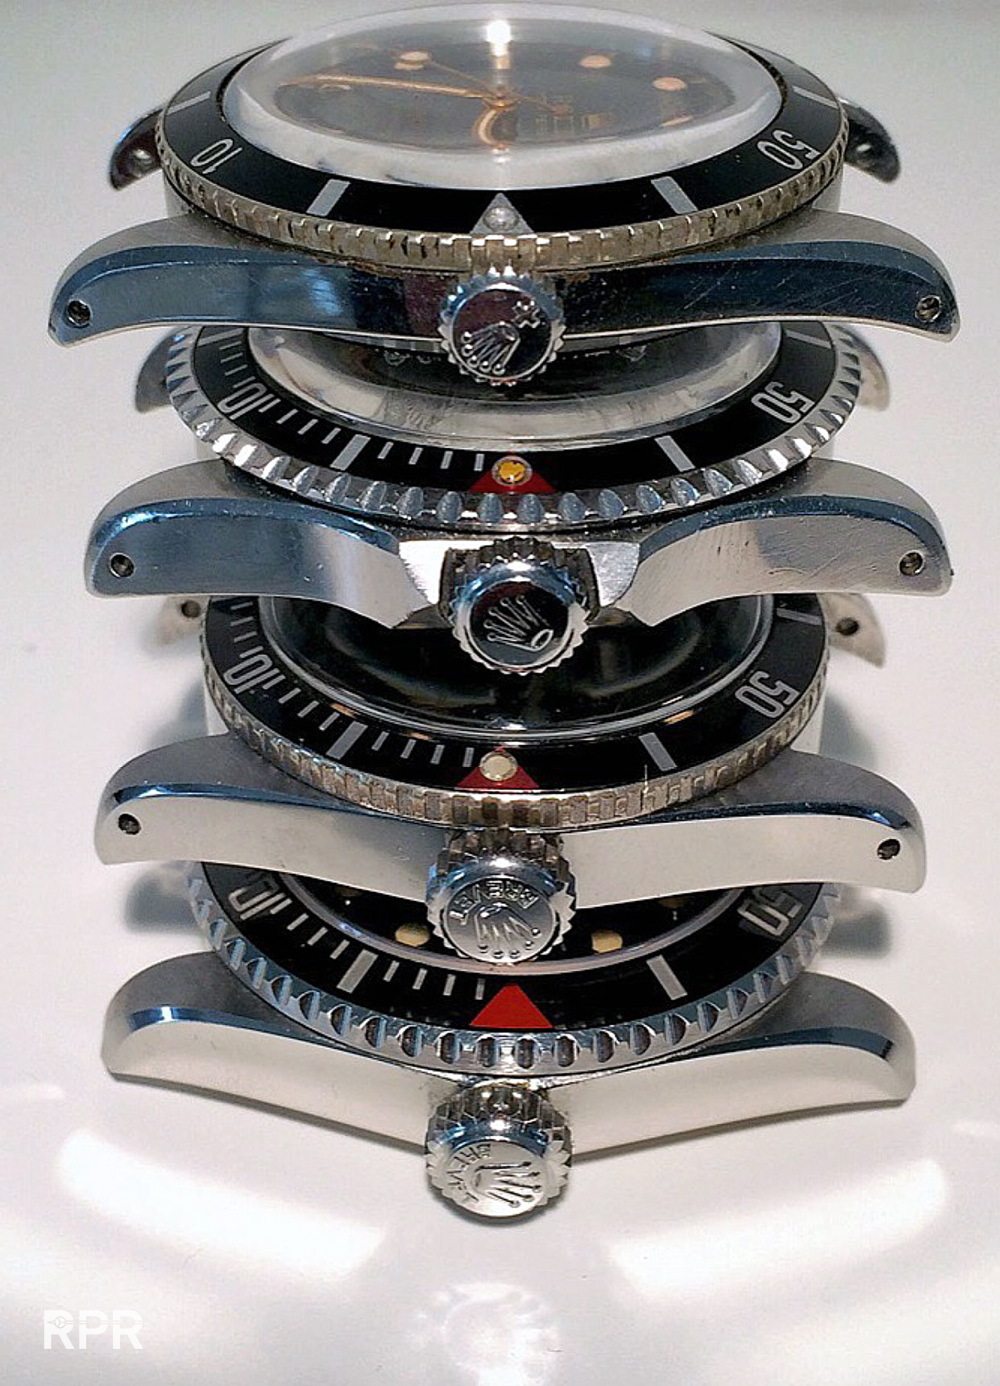 The flat bezel for the Ref 6541 has specially been made for the U.S. market
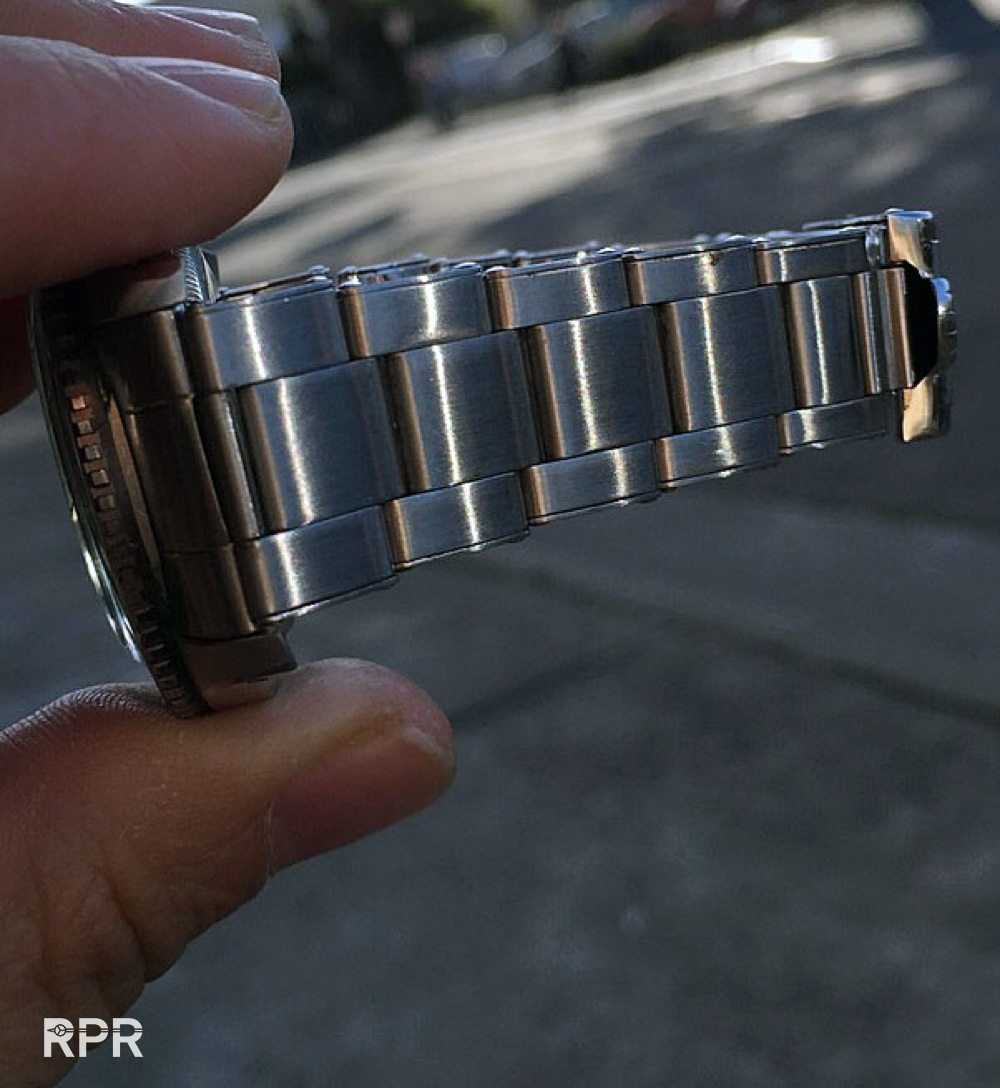
- Is the bracelet having any stretch?
- Have any links been removed?
- Is the inside of each rivet in the bracelet un bended?
- Are the screws used on the side to remove the link?
 How do the bevels look? Round, worn, polished? If the bevel looks brand new, while the dial is not, something is wrong. If it is polished, then by whom? Rolex during service or an independent watchmaker? Certainly a trigger to look for replacement parts. Check below the stunning work LA Watch Works did…
 Here’s a summery from the checklist to determine the condition of your vintage Rolex:
Case Condition
- Magnify the matt parts of the case
- Magnify lugs
- Magnify bevelled edges between matt part and middle case
- Case back engravings worn out
- Hallmarks on back of lugs worn out but fresh case
- Satin polish: difference case back inner circle and outer rim
- Missing straight fine lines
- Missing sharpness on edges of lug holes
Wear indicators case side
- Original crown or replacement
- Replacement crown periodically correct
- Magnify pushers if present
- Magnify top left lug for heaviest wear (left wrist watch wearers)
- Magnify below lugs for end link scratches
- Magnify below lugs for dirt/dust
Wear indicators case back
- Magnify screw thread for frequent opening of case
- Original rubber sealing ring present
- Original rubber sealing ring or replacement
- Tarnish on screw thread
- Magnify case back for service codes
Wear indicators glass
- Original crystal?
- If original, is there any ‘icing” visible
- Is it a later service crystal with sharp edge
- Correct crystal type corresponds with model
Wear indicators movement
- Patina movement corresponds with patina watch
- Magnify screw near crown for damage, those are often used to get the movement out of the case
- Magnify the screws that hold the movement in it’s place, in below example at the edge in the middle of the lugs.
- Magnify small screws for tarnish and if they have been used. Often a used one will show you burr on the screw.
- Examine the screw thread. Often the rubber seal shows you wear. Also salt water will leave marks clearly visible.
Serial Number
- Serial Number present
- Magnify Serial Number for clear engraving
- Worn out Serial Number corresponds with worn out case
- Serial Number matching with model
- Serial Number matching with production date inside case back
Reference Number
- Reference Number present
- Magnify Reference Number for clear engraving
- Worn out Reference Number corresponds with worn out case
- Reference Number inside case back matching with number in between lugs
- Reference Number matching with model
DIAL
Luminous
- Type of luminous matching with period of model:
- Swiss print with Radium luminous
- Swiss + ! with lower Radium luminous
- Swiss + _ with Tritium luminous
- Magnify for Golden Swiss, white Swiss, double Swiss corresponds with period of model
- Swiss – T<25 / T-Swiss-T / T-Swiss-T<25 corresponds with period of model
- UV-lamp lest luminous glow for several minutes
- Overall matching luminous in colour and fluffiness on dial, hands and markers
- Colour of luminous matches period of model (<1964 cappuccino vs yellow)
- Colour of luminous greenish indication for water damage
- Stains on dial due to damage Radium luminous
- Luminous paint completely inside surrounds
Composition
- Cracked dial when tilted in light
- Magnify gilt lettering for correct application
- Glossy dial corresponds with period of model
- Matte dial corresponds with period of model
- Tropical dial corresponds with period of model
- Tropical dial with intact luminous
- Rolex print under/over lacquer layer
BEZEL
- Ribbed edge of fluted bezel matches period of model
- Is the inlay original and matching the all over patina.
- Faded inlay matches dial and luminous, often inlays get changed.
Bracelet
- Is the bracelet having any stretch?
- Have any links been removed?
- Is the inside of each rivet in the bracelet un bended?
- Are the screws used on the side to remove the link?
I hope my checklist to determine the condition of your vintage Rolex has helped you. Check also following studies:
- My Vintage Rolex Buyers Guide
- The Evolution of the Daytona
- The Importance of the Vintage Rolex Dial
- The Evolution of Rolex Luminous
- What is your Vintage Rolex Worth?
- The Small and Big Crown Submariner Story
- The Ghost Daytona Oyster Paul Newman
- The Exclamation Mark
- The Story about the Rolex Prototype Dials
- The Rolex Sultan of Oman Story\
- The High Quality Fake Rolex Dials
Many more interesting articles I have shared with you in the past you find in my RPR Archive. If you have any questions, please send some pictures by my RPR Contact button. Cheers Philipp

